 Юлия Алексеева
Using Art Brush and gradient
1. Drawing a needle
Select the Ellipse Tool (L) and draw an ellipse as shown in fugure 1. Select the anchor point using Direct Selection Tool (A) and click Convert selected anchor points to corner to make the needle end pointed.
.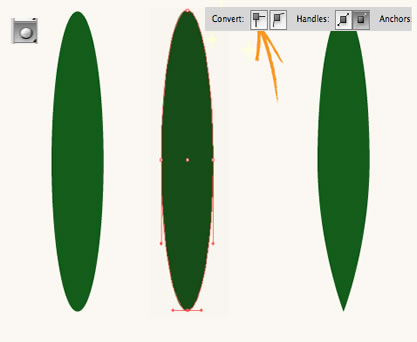
Fig. 1 Drawing a needle
Select the resulting object and make a new brush in the Brushes (F5) window.
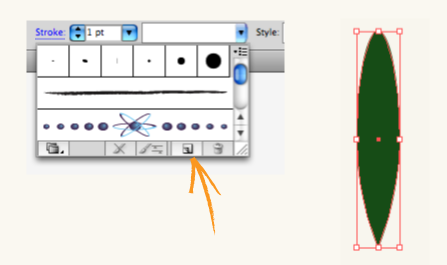
Fig. 2 Making new brush
Select New Art Brush in the New Brush window. The brush options window should appear (figure 3). I prefer to draw from bottom upward, so I chose the corresponding direction. Let's call the new brush "Needle".
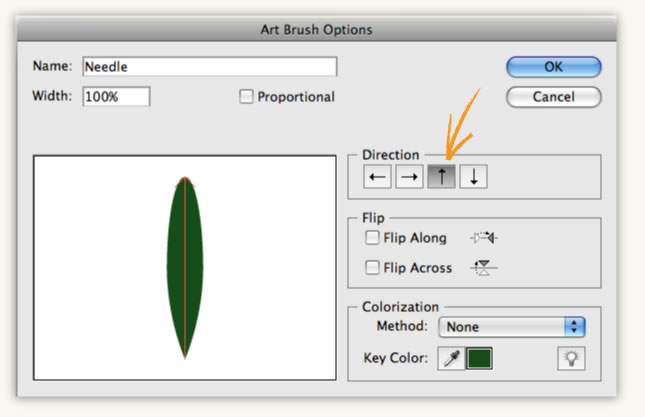
Fig. 3 Setting brush parameters
2. Drawing a brunch
Select the Paintbrush Tool (B) and the Needle brush in the Brushes window. You can draw the rough contour of the future branch for convenience as shown in figure 4.1.
Let's draw the needles starting from the bottom up left to right and then right to left (figure 4.2). This way we'll be moving up and the upper needles will be on top of the lower ones. To visualize this process I set the brush transparency at 50% (figure 4.3).
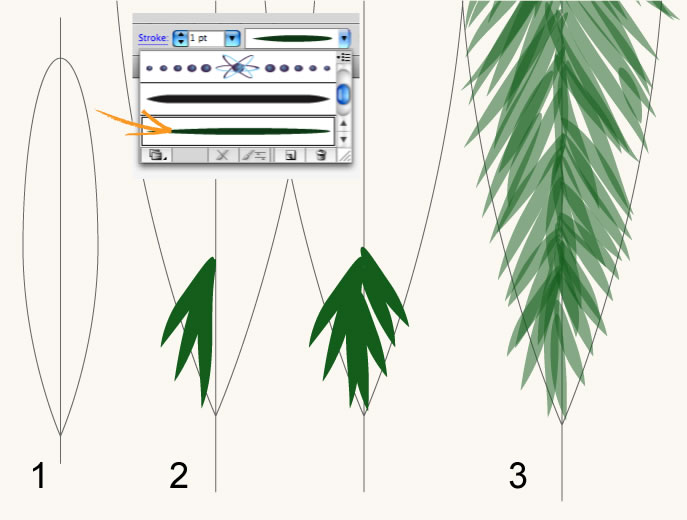
Fig. 4 Drawing a branch
Now we can remove the contour, select the branch and make it opaque.
Select the branch and create a new brash the same way as we did it before. Figure 5 presents the result of applying the new brush to a path.
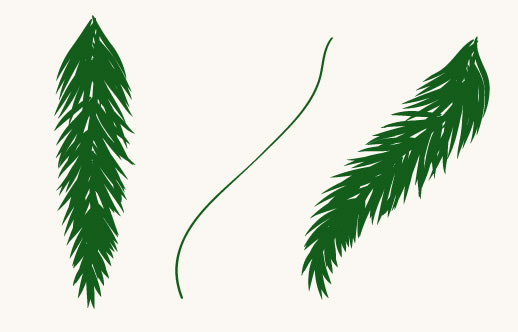
Fig. 5 Drawing a branch
3. Adding volume
I prepared 3 gradient variations for branches with different illumination levels (figure 6).

Fig. 6 Gradients
First, we draw the branches at the back as shown in figure 7.
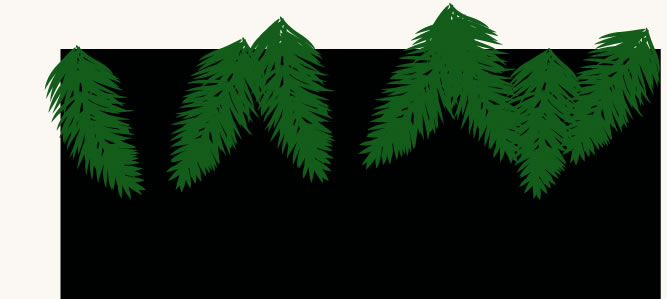
Fig. 7 Drawing branches at the back
Select the branches you just drew and open the Object/Expand Appearence menu item. Pick the Eyedropper Tool (I) and click the first gradient sample. Select 90° angle in the Gradient (Ctrl/Cmd-F9) window.
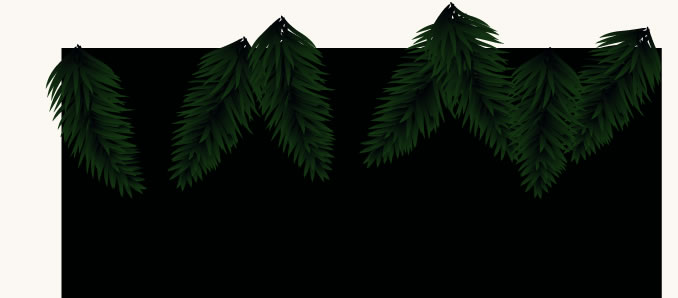
Fig. 8 Branches after applying the gradient
Let's draw more branches in the new layer and repeat the same gradient applying procedure using the second gradient sample.
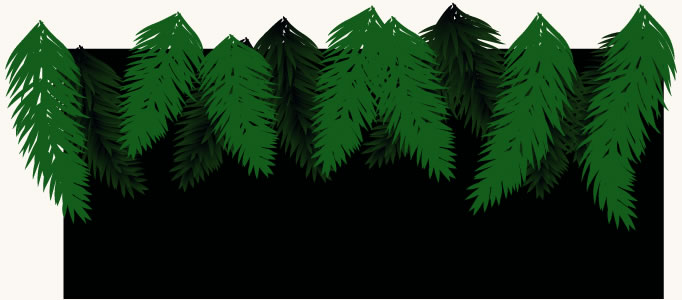
Fig. 9 Drawing the second layer of banches
Finally, let's add the upper layer with the brightest branches.
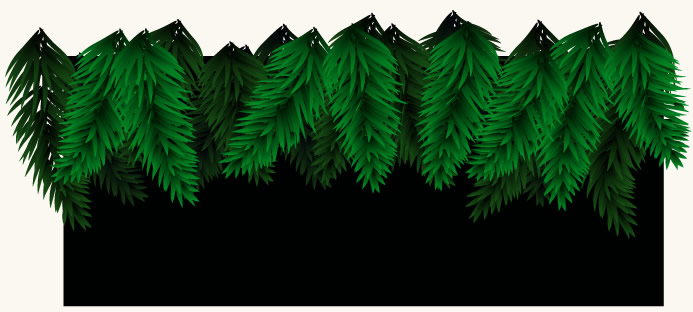
Fig. 10 Branches are ready
4. Adding shadows
Now we can add depth using shadows. There are several methods to do this. The simpliest way is to copy the branches to the background, shift them a couple of steps lower and a couple of steps to the right and apply the transparency mode "Multiply". The more careful you work with the shadows the better the final result will look.
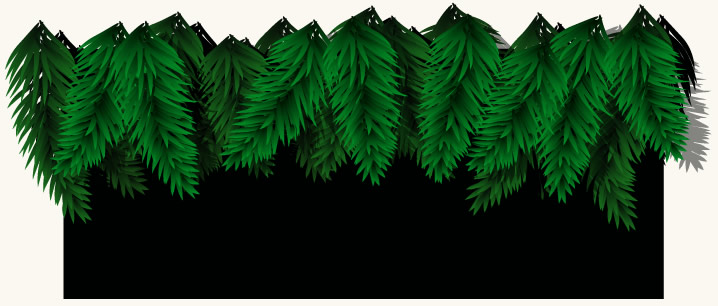
Fig. 11 Christmas tree branches with shadows added
When the picture is ready you can crop it using the clipping mask or export it to a raster format using artboards.