 Юлия Алексеева
Using The Blend Tool
1. Drawing the star contour
First, use the Pen Tool (P) and draw a star the same way as you would do it on paper (figure 1).
.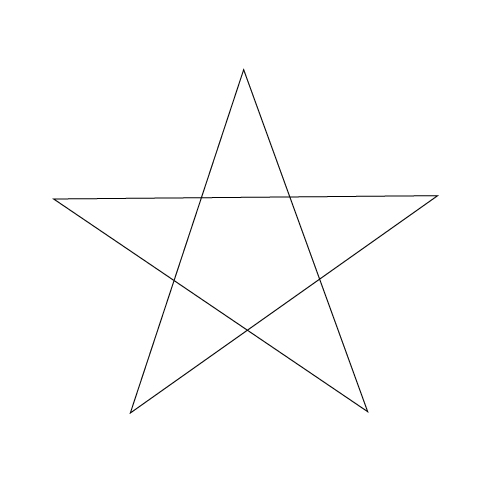
Fig. 1 Drawing a star
Open the Pathfinder window (Shift+Ctrl/Cmd+F9), select the star and press the Unit button (figure 2).
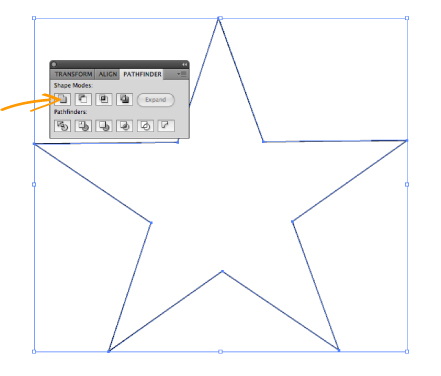
Fig. 2 Joining the star contour
The contour of the star is ready.
Copy the result to a new layer (it will be used later). You can lock this layer or move it away to the side for now.
2. Colouring
Fill the contour with dark-red colour and remove the stroke (figure 3).

Fig. 3 The coloured star
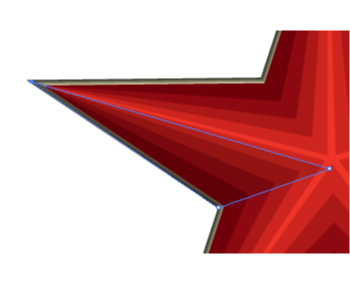
Use the Pen Tool (P) again to draw the shape shown in figure 4 inside our star. Fill this new object with bright red colour.

Fig. 4 Drawing the star edges
Open the options dialog of the Blend Tool (Object/Blend/Blend Options...) and set Specified Steps to 3 as shown in figure 5.
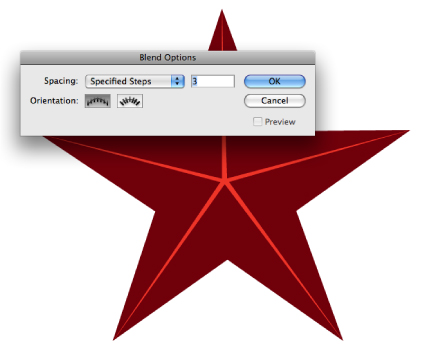
Fig. 5 Setting the blend options
Keep the selection and apply the Blend Tool (Alt+Ctrl/Cmd+B or Object/Blend/Make). The result is shown in figure 6.

Fig. 6 The result of applying the Blend Tool
3. Adding the frame
Copy the star that was created in step 1 (Ctrl/Cmd+C) and Paste to Front (Ctrl/Cmd+F). Make the background star slightly larger and set Horisontal and Vertical Align Center. Fill the background star with dark green, and the front one with light yellow colour (figure 7).

Fig. 7 Drawing a frame
Select both green and yellow objects and apply the Blend Tool (Alt+Ctrl/Cmd+B or Object/Blend/Make).
Put the result under the red star (figure 8).

Fig. 8 The star with the frame
4. Adding lighting and volume
Draw triangles as shown on figure 9. Fill it with light yellow in the illuminated areas and apply transparency mode Lighten = 30 % (Window Transparency Shift+Ctrl/Cmd+F10). Fill the shadows with dark red and set the transparency mode Multiply = 40 % for them.
 |
 |
Fig. 9 Adding shadows and brighter areas
The star is ready!

Fig. 10 The star is ready
Now what is left to do is to add the background and the pole.